Silhouette Mint Photo Stamp
Sep 05, 2019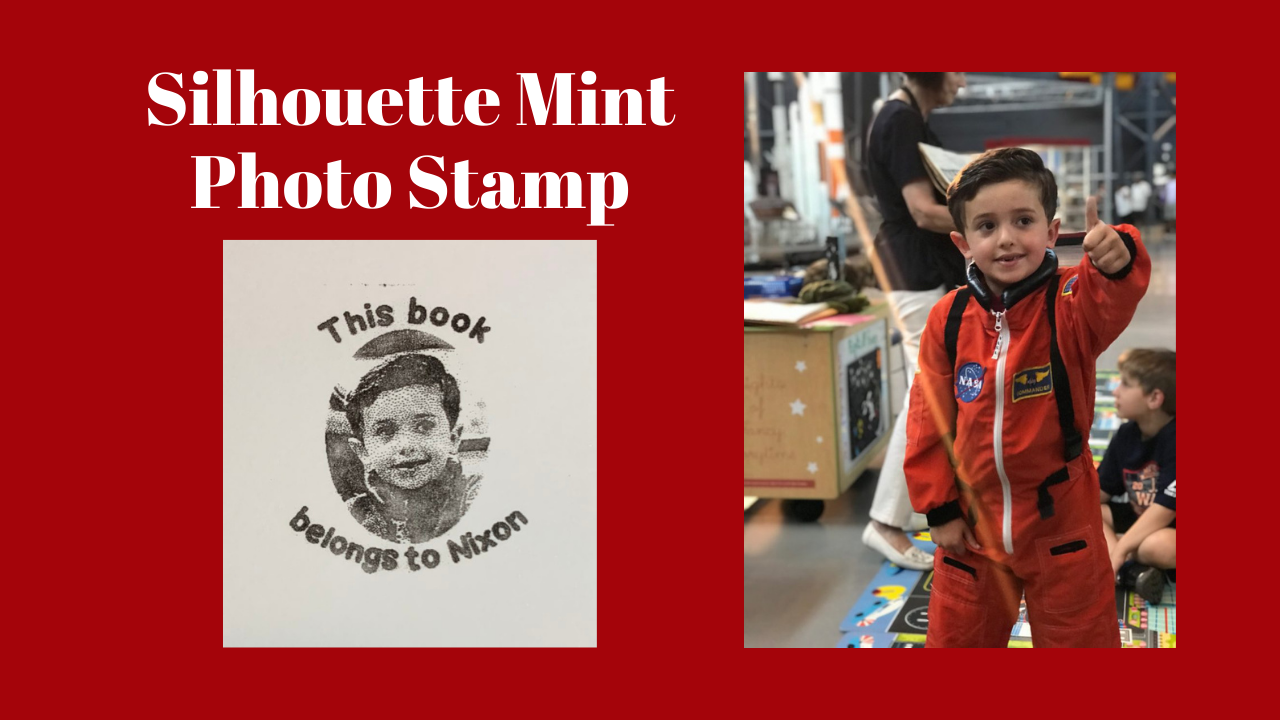
I absolutely love my Silhouette Mint. I feel it is often overlooked by its cousins, the Silhouette Cameo and Curio — but I was excited when it was first introduced & still am today! I recently taught the Mint class at the Silhouette Instructor Licensing, and will also be sharing it at this weekend’s Silhouette Getaway Weekend, September 6-8, 2019. AND, we will have Mint classes at November’s All Things Silhouette Conference. So I thought I would share a tutorial with you today on how I created a Photo Book Stamp for one of my grandsons, the Silhouette Mint software!


CREATING YOUR MINT STAMP:
Download the Mint software from Silhouette America. This software is different the Studio – -which is what you use for the Cameo & Curio. When you open the Mint software, it will look familiar — similar but different from Studio. For a complete software overview, check out this awesome video tutorial. Its the best I’ve seen. Silhouette America also has a great FREE e-book on the Mint Software!
But I wanted to share with you how I created this adorable Book Stamp for my grandson Nixon! He loves books – -and is in Pre-K this year – so it won’t be long before he is reading himself! All of my grandsons really do love books, so I’m thinking that I will be making one for each of them!

First, I started with this picture of him at the Air & Space Museum here in the DC area. Not all photos will be good for stamps. You need to select one with a lot of contrast, and preferably a light background. You will just have to test photos to see how they work out for you.

Next, click on the Stamp Settings Panel and select the size Stamp you are making. (Mine is a 45×45 for this stamp).

Then open the Crop Panel, and you can see there are several crop templates, some knife tools & a magnet trace tool. You can even use select the shape you would like to use to crop your photo. You can even choose a frame or shape drawing tool on the left hand sidebar to draw out a different crop shape, but for this stamp, I am using the pre-set oval.
In order to adjust the shape before cropping, be sure to Uncheck Auto Apply. Drag your mouse around the part of the design you want to crop –>when satisfied, click Apply Selected Shape as Crop Template.

Then delete the excess & drag your cropped photo into the stamp area. You can adjust the size of your photo here to fit the proportions of the stamp. Click on the Filters Panel Icon to open. You will see your photo switch to a filtered image. You can adjust brightness settings to see whether or not you like this filter. The “Standard” filter is the default — and I even when adjusting the brightness settings, I didn’t like this filter.

My favorite filter for photos and faces is the Realistic Filter. Each filter has sliders to adjust, and I have set the Brightness setting to about 80 — with this Realistic Setting. With the image selected, you can play around with the filters and sliders for each filter to customize your photo to your liking.

ADDING TEXT:
Once you are satisfied with your image, its time to add the text. To add your text, select the Text icon on the left hand tool bar and click on the work space. Type out the text that you would like on the top of the stamp. The Text panel automatically opens, and you can select the font that you would like to use. I used the “Back to School Font” from the Silhouette Design Store.
The Mint software has a variety of curve text options – so open the Curved Text panel. (Note that when you are NOT in the Filters panel, the image turns back to the original. No worries — it will maintain your filter when you are ready to print your stamp). With the text selected –>choose the curve option you would like to use. For this stamp I used the slight curve. Repeat the process for the bottom of the stamp & size down the text to fit the stamp.
With both the image & text selected, go to the top toolbar–>Object–>Align–>Alight Options — you will see this Align Panel appear. Select Align Middle; then Space Vertically & Center to Stamp. Be sure that you keep everything selected while you do this.


Your Stamp is now ready to send to the Mint to print! Note that when you select one of the two “Send to Mint” icons, that the image automatically mirrors, and your filtered image reappears. The Mint also knows what size of Stamp you have selected, so be sure you use the right size media. (Note, the Mint won’t print your stamp if these don’t match!)

For information on how to Print the Mint Stamp, Ink & Stamp Off — go to this blog post on the Silhouette 101 blog! It is a great tutorial on how to print, ink & stamp off your new stamp design!
There are so many awesome uses for the Silhouette Mint & creating custom stamps! For kids like this, teachers for grading papers, or just happy stamps — also, gift tags for holidays or birthdays, for use in your planners, the list goes on & on!!!
Until Next Time -

Stay connected with news and updates!
Join our mailing list to receive the latest news and updates from our team.
Don't worry, your information will not be shared.
We hate SPAM. We will never sell your information, for any reason.
Meet The Author

